Tag Archives: yoga

Why Go Upside Down?

21 Aug 15
admin
,
2 comments

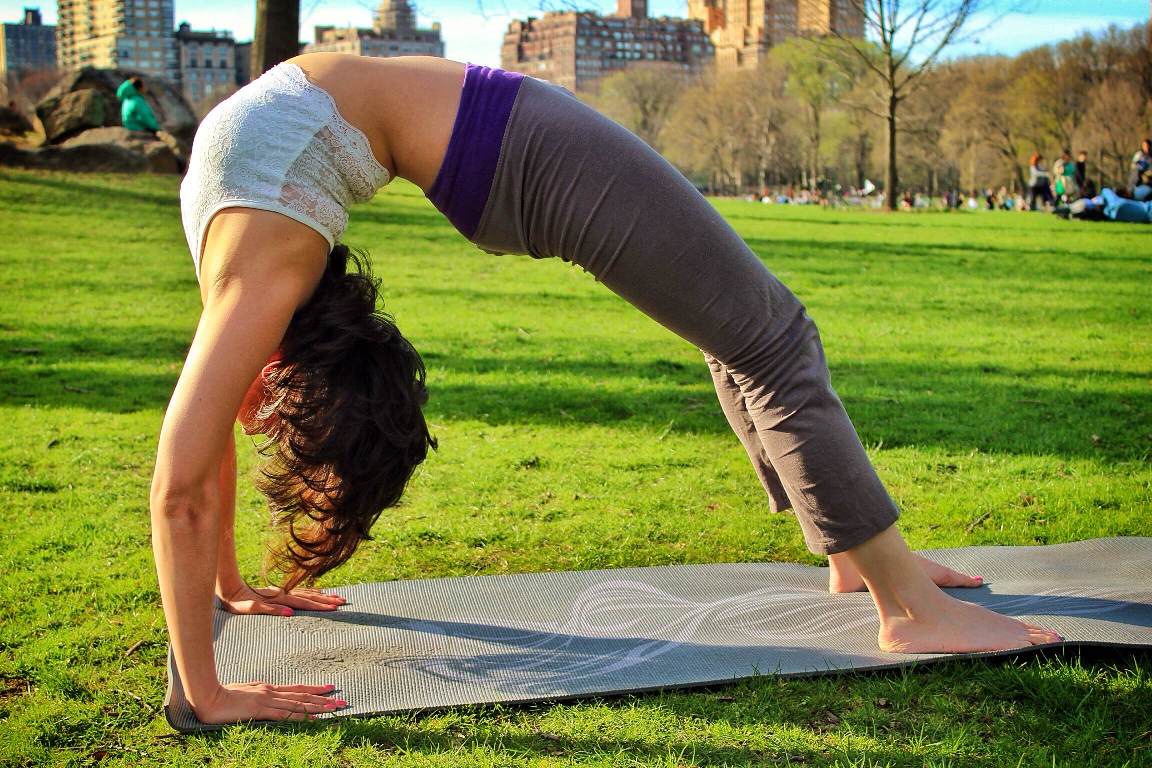
Yoga is full of inversions, which basically means where your head is below your heart.  Why does that matter and why should you do them?  Obviously, because it’s fun!  But here are a list of other reasons why you should go upside down.

A DSCF5496

  1. Mentally, it shakes things up.  We are always looking, thinking, and living from a position with our heads above our hearts or parallel to our hearts.  Flip your body around, and your mind starts flipping, too.
  2. Mentally, it opens up your mind.  By trying out a new point of view (being upside down), you are stretching your mind’s capabilities, thereby allowing more room in your mind to be open to other experiences, points of view, thoughts, etc.  But spending part of your life upside down, it gives you a new perspective on life.
  3. Mentally, it helps you face your fears.  Going upside down can be scary at first for many people.  By addressing this fear and learning how to conquer going (and staying) upside down, you build your character and your confidence.
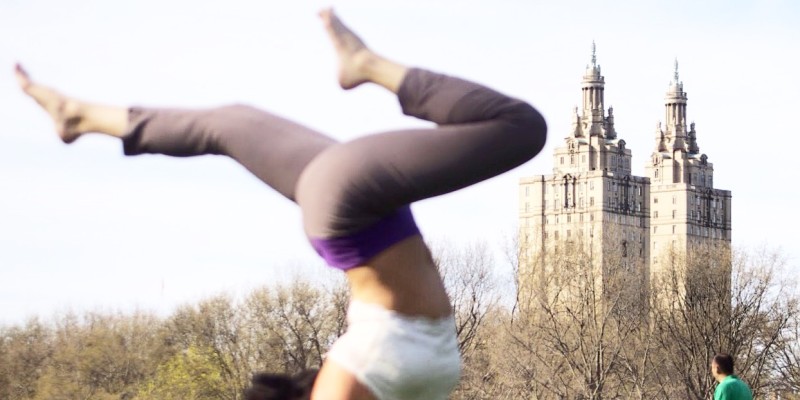
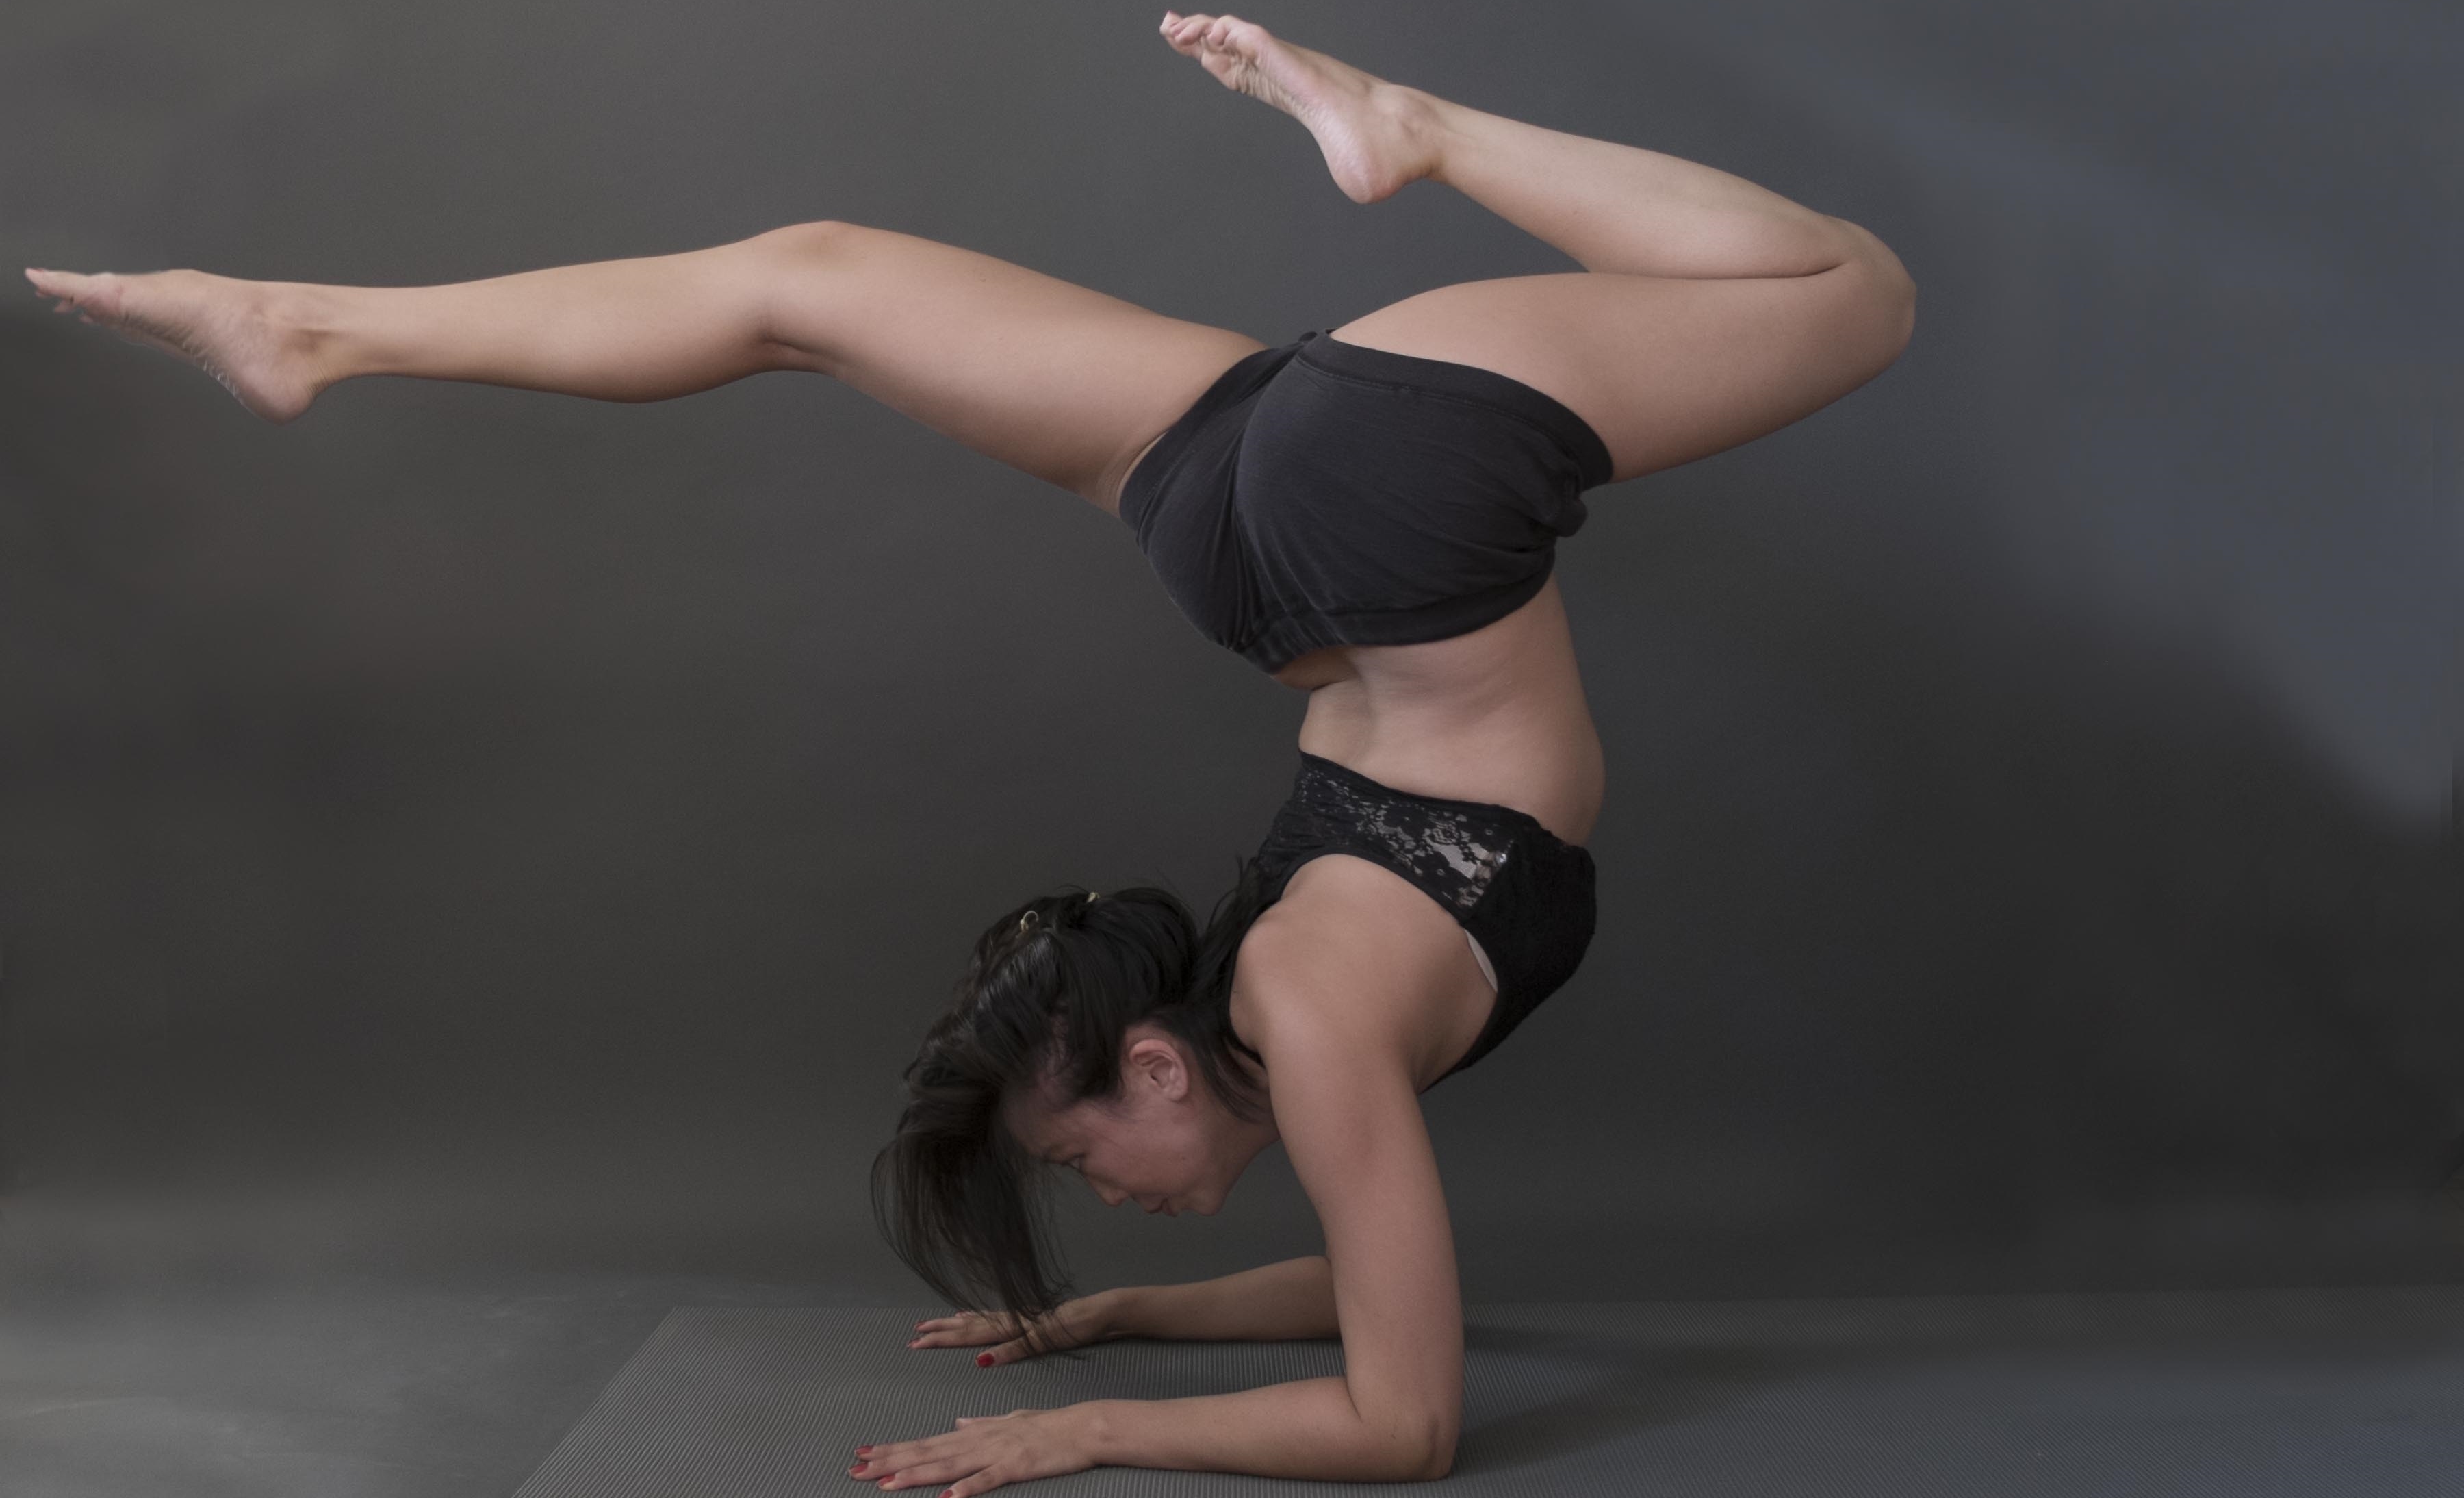
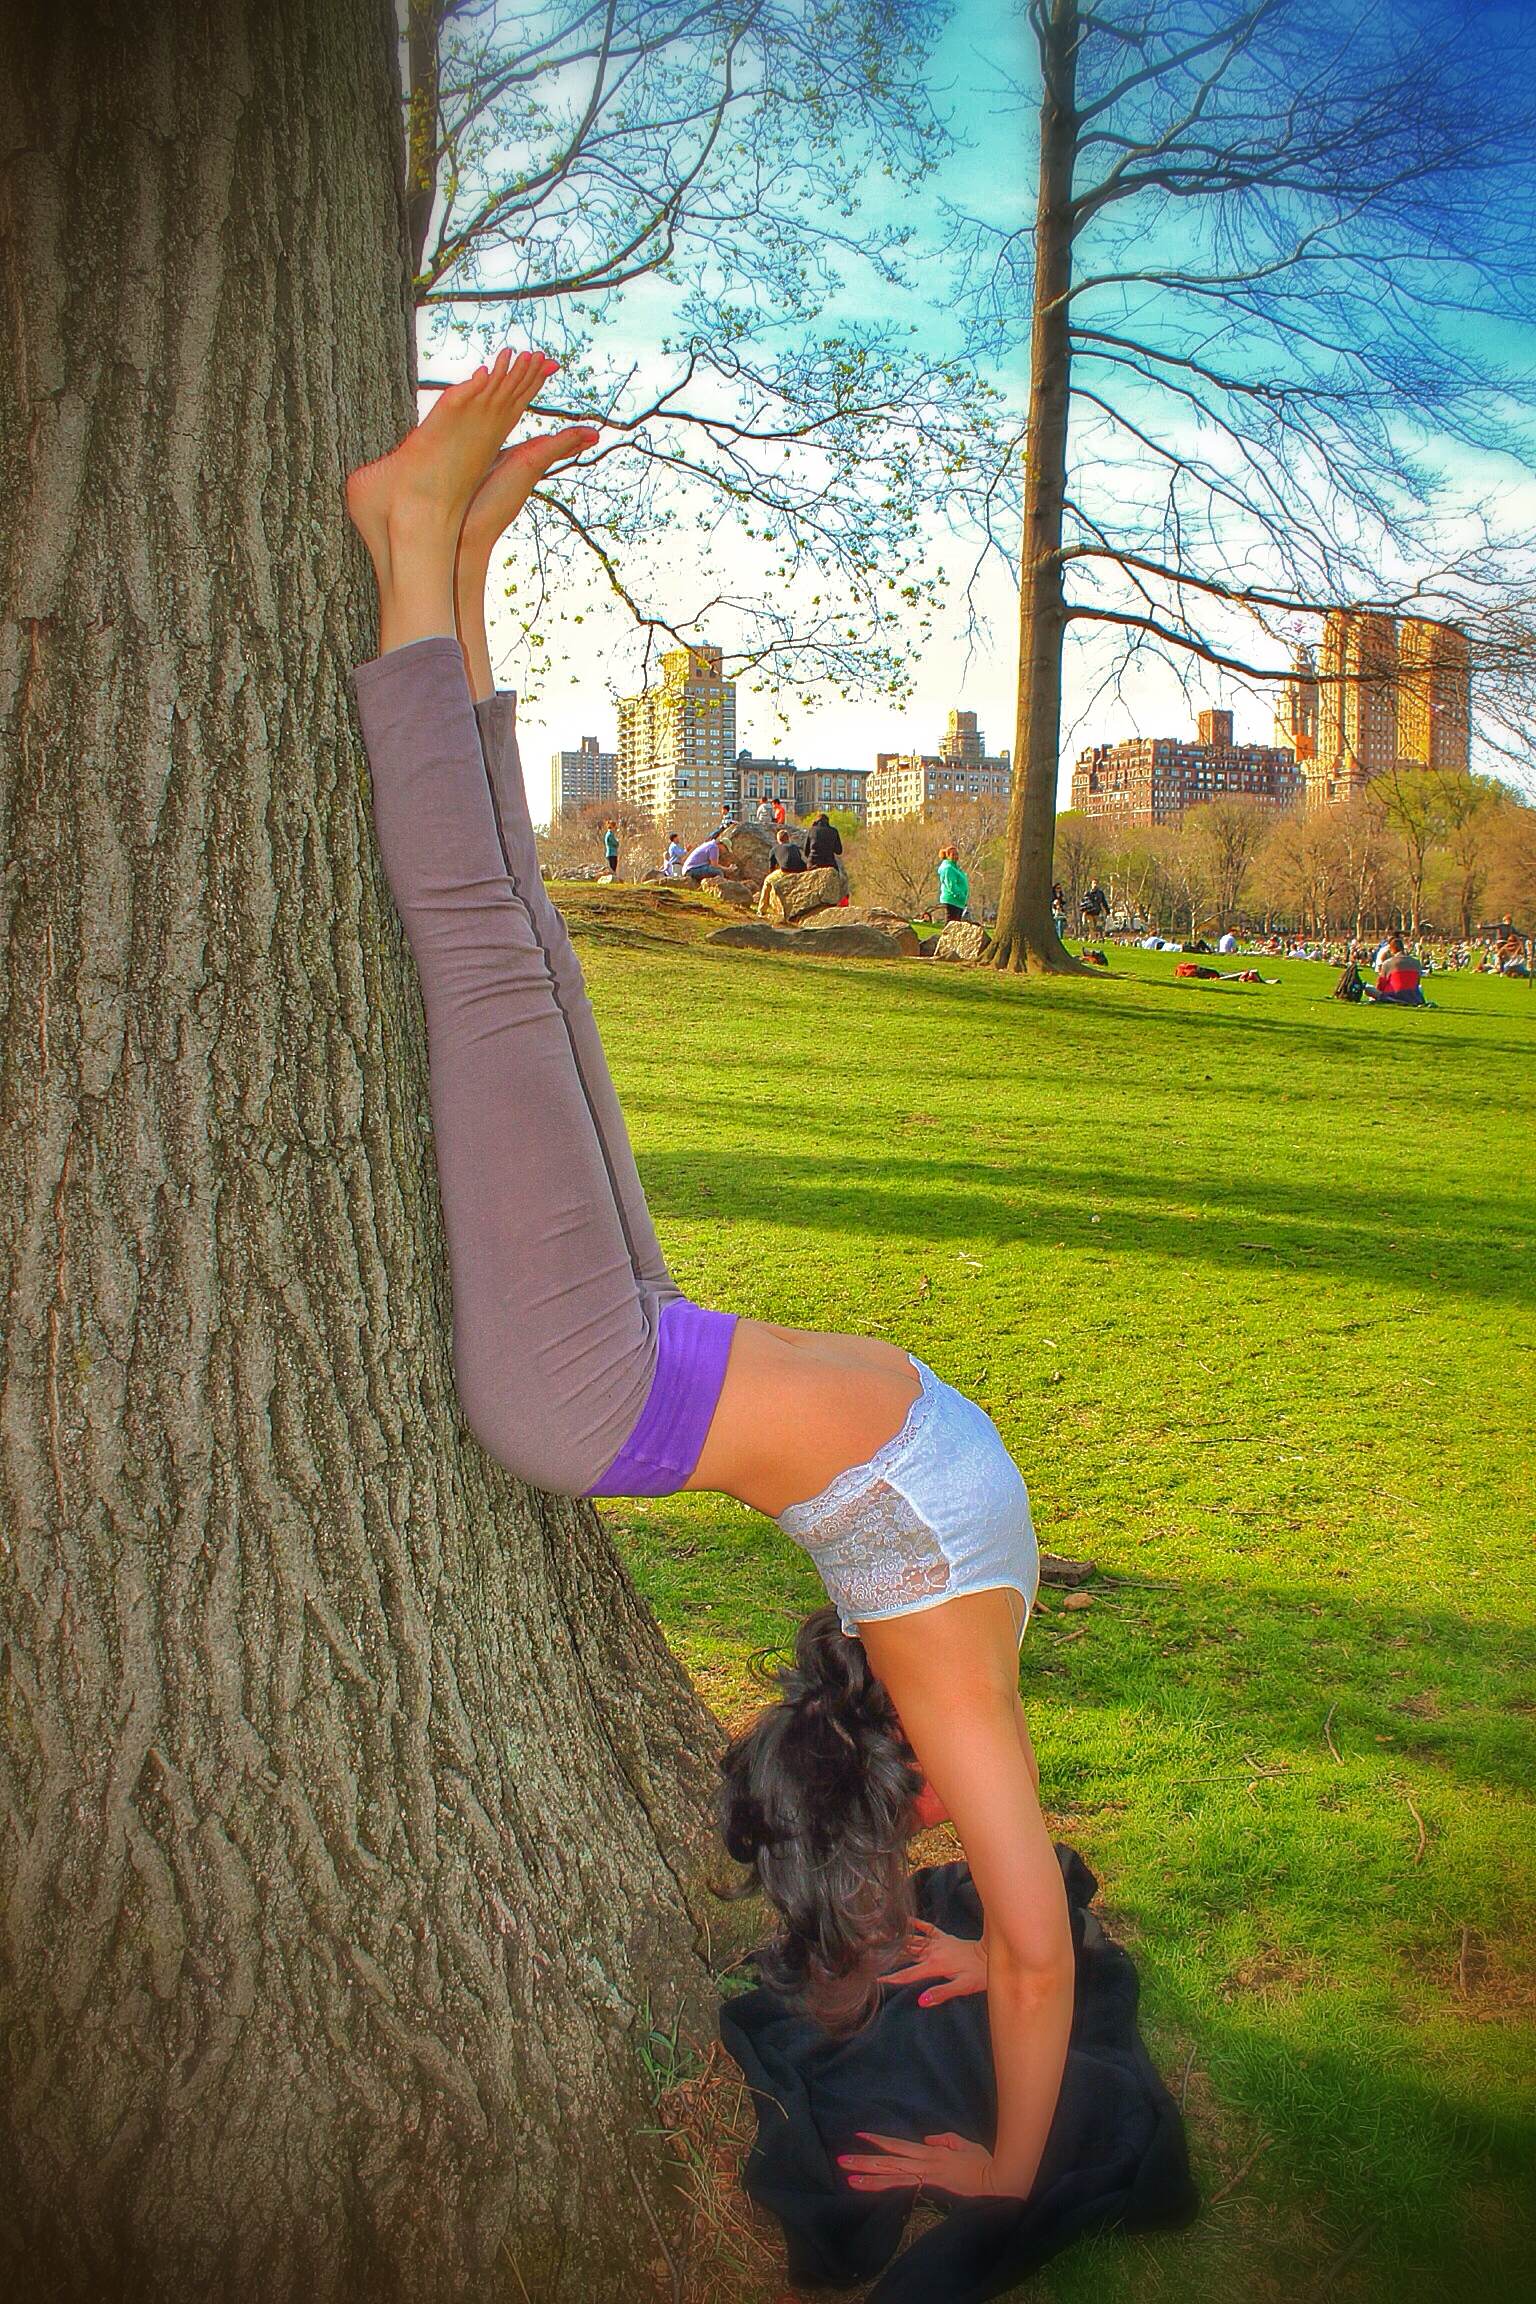
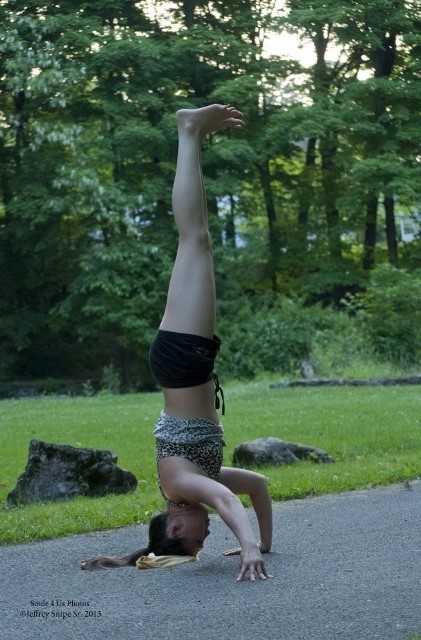
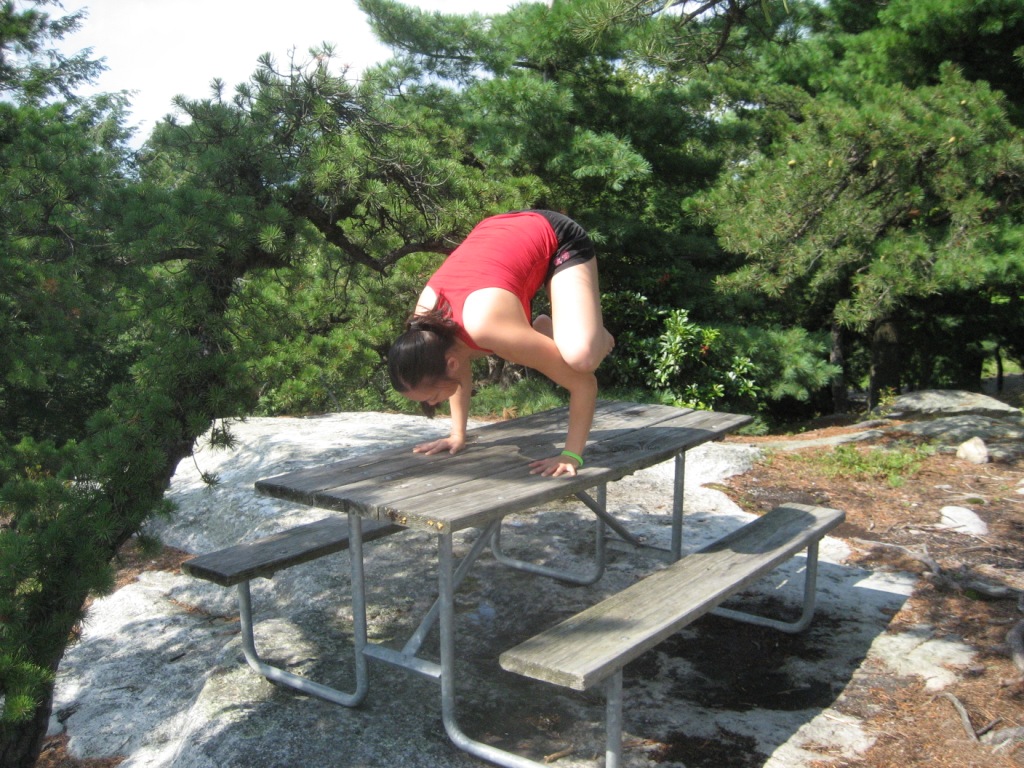
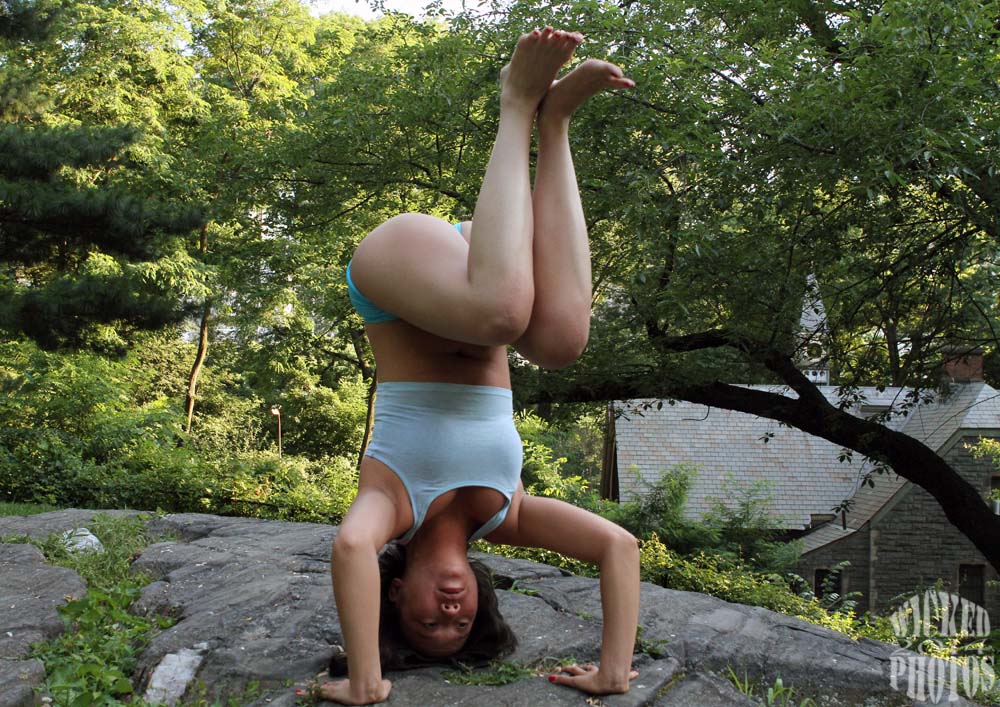
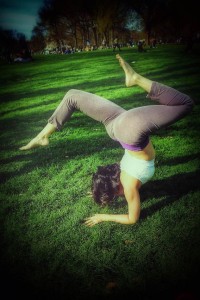
  4. Physically, it strengthens your core, as well as other parts of your body, depending on what pose you do.  For example, forearm stands, like above, also strengthen your shoulders, back, biceps, and triceps.  Handstands, even those against the wall (or the tree like below) also strengthen the same body parts, but to a different degree and in different parts of the same areas.photo1 (1)
  5. Physically, it helps reduce wrinkles.  The increase in blow flow and oxygen helps rejuvenate your skin, plus the gravity helps reduce the wrinkles.
  6. Physically, it can either energize you or relax you.  Energizing inversions are those that require more effort and will get your heart pumping more.  They include headstands, forearm stands, and handstands.  Relaxing inversions help calm the nervous system and produce feelings of balance and calm.  Doing relaxing inversions like shoulder stand and legs-up-the-wall can help you fall asleep if you are having trouble.
  7. Mentally and Physically, it helps increase circulation to your brain and provides oxygen to your brain, thus assisting with mental functioning, and improving concentration, memory, and processing abilities.
  8. Mentally and Physically, it helps your heart and your blood pressure.  They enable the heart to rest a little bit, because since the blood pressure to the brain is increasing, receptors that regulate blood flow sense the increase and signal the heart rate to lower and blood pressure to reduce.  This will also help your mood.

These are just a few benefits, but there are so many more.  They help relieve sinus congestion, they help boost your immune system, they help you act like a child again by playing around, they’re natural anti-depressants, and they assist in digestion!  So give it a try!  It’ll be worth it!

????????????????


Previous Yoga Post – Crow – The Gateway Arm Balance

Crow – The Gateway Arm Balance

01 Jan 15
admin
,
No Comments

Arm Balances

Arm balances look intimidating.  They feel intimidating.  But they’re fun, trust me!  Crow pose is what I like to call the gateway arm balance pose.  Once you figure your way out of crow pose, you understand arm balances much better, and the more advance arm balances become easier to work your way around.  The reason crow pose is the best way to start getting into arm balances is because the distribution of your weight is condensed into a small, compact area, so it makes it easier to determine your balance.  So here are a few tips:

  1. Understand that it’s not so much a matter of arm strength or balance, but of learning how to distribute your weight.
  2. The closer your get your knees to your arm pits, the easier it’ll be.  Positioning your knees outside your arms and pushing into your arms while keeping your arms engaged will help you maintain stability.
  3. Getting into this pose doesn’t involve lifting up, but leaning forward into your hands until your feet lift off.  Then tuck your feet in if you can.
  4. Most people look down at the floor – try to look more forward.  Looking at the floor is a good way to find yourself there.
  5. Engage your pelvic muscles for more stability.
  6. BREATHE!

And that’s it!  Hopefully these tips will help you get into this fun and simple pose!

IMG_2988

Previous Yoga Post – Standing Bow Tips

Next Yoga Post – Why Go Upside Down?

Knock Out That Headstand!

04 Jul 14
admin
, , ,
No Comments

Headstands can be intimidating at first.

 photo2


Forward folds will help you get used to the idea of being upside down.


Once you get used to being upside down, it’s now just a matter of getting your body positioned so you can get your legs in the air.


So here are some tips:down dog

  • Usually we are taught to get into it from downward dog.  Whether or not you are in headstand with your forearms on the ground or in tripod headstand with just your hands on the ground, you want your elbows to be no wider than your shoulders.  An easy way to measure is to bend your elbows and grab the opposite elbows with your hands.  That’s the width.  Do not go wider than that.  You will risk crunching into your shoulders.  You want to gain your strength by pulling your shoulders away from your ears and push into your hands or forearms.  If your forearms are on the ground, you want to feel as if you can lift your head off the ground.


  • If you’re in tripod, make sure your arms are at a 90 degree angle and your elbows are shoulder-width apart.
  • Bring your feet in until your hips are above your shoulders.  That is where your stability will be.  Lock that position in by keeping your tailbone tucked in and your mula bandha (pelvic muscles) engaged (squeeze them).victoria (4)
  • Once that happens, I find the easiest way to get into it is to bend one leg into your body, lifting that foot off the ground, then the next.  The reason this is easiest is because your center of gravity has little danger of shifting.  If you’re doing tripod, you can rest your knees on your upper arms.
  • Then, slowly raise your legs up.  Engage your legs.  I find the best way to do this is to flex your feet as if you’re standing on the ceiling.  Keep your tailbone tucked!  Engage your belly and your pelvic muscles!  Stay focused on one spot somewhere.
  • Don’t let stray thoughts into your mind.
  • Practice, practice, practice!


Previous Yoga Post – Downward Facing Dog

Next Yoga Post – Standing Bow Tips

Downward Facing Dog – Basics on the Basics

27 Jun 14
admin

one comments

Anyone who has heard of yoga has probably also heard of downward facing dog.  So those who start out practicing yoga tend to skip over the correct alignment since they’re under the impression that this is such a basic pose.  But it’s not really as simple as one may initially believe.  So here are some pointers on how to get your body positioned right.


Distance – Let’s start with how far your hands and feet should be from each other.  Position yourself in plank pose – in other words, the top of a pushup.  Your shoulders should be just a little forward of your wrists.  Now, keeping your hands and feet where they are, tilt hips up until you form an upside-down V.

Hands – Keep them about shoulder-width apart, fingers spread wide apart and facing forward.  Push into your knuckles and the fleshy part of your hand between the thumb and first finger.  Less weight/pressure should be on your wrists.

Feet – They should be hip-width apart, facing forward, and parallel to each other (maybe even slightly pigeon-toed, as in turning toward each other).  To measure, take your fists side by side (so that the thumbs touch) and put them between your feet.  That’s the distance they should be.  Aim your heels down toward the floor.  It is very unlikely the heels will be touching the floor and that’s okay.

Shoulders – Pull them away from your ears and chest.  You should feel as if you are lifting yourself up, by pushing into your hands.

Back – You want a straight back.  Don’t curve it too much in either direction.  You should feel like you are squeezing your upper back muscles, or your deltoids, together behind your back a little bit.

Ribs – Tuck your ribs in so that they don’t jut out.  Imagine as if someone is zipping your ribs together.

Stomach – Engage your abdominal area and tuck it in.

Tailbone – Tuck in your tailbone, but not so much that you end up like an upside-down U instead of V.

Hips – Bring your hips up to the sky and back behind you.

Pelvis – Squeeze your pelvic muscles, as if you are trying to stop urine from coming out.

Legs – Keep your legs strong, steady, and straight.  The looser your hamstrings become, the better your downward dog will be.

Head – Gaze toward your pelvis or, if you can’t do that, at your feet.  Shake your head a little bit to loosen tension.


down dog


Previous Yoga Post – How to Safely Bend Your Back More Deeply

Next Yoga Post – Headstands

How to Safely Bend Your Back More Deeply

17 Jun 14
admin
,
2 comments

Getting your back to bend deeply back is not an easy task, and if done incorrectly, could result in injuries.  I know from personal experience.  So here are my tips on how to get there one day without harming yourself.


The most important thing is to listen to your body.  Know where your limit is.  Go further than your comfort level, but don’t go past what your body can handle.


Secondly, take your time.  This is a process, a journey.  Don’t be in a rush.  You will get there eventually.  Think of it as slowly waking up your back so that it can be limber.


Now, alignment.  The most important physical cue I have learned is to tuck in your tailbone.

Notice how, in this picture, the pelvis area is aiming forward.  That is because the tailbone is tucked in.  If you don’t tuck in your tailbone, you crunch your lower back and eventually hurt yourself.

If you’re in a lunge, like in the top picture, bend your back knee and tilt your pelvis forward.  Then, keep your pelvis secure as you straighten your knee again.  You will notice your pelvis will feel more stable.

Next thing is – lift from your upper and middle back.  That is where you want to bend from, not your lower back.  It’s a little hard to tell in this picture, but the the curve begins above the lower back.  The lower back is actually pretty straight in all these backbends.

Also, open your chest.  In other words, bring your shoulders back behind you.

Now, if your backbend involves your arms above your head, like in this photograph, don’t forget to draw your shoulders down away from your ears.


Having that said, I wish you the best of luck!  One day you may wind up coming around full circle!


Previous Yoga Post – Why You Should Do Yoga

Next Yoga Post – Downward Facing Dog

Why You Should Do Yoga

08 Jun 14
admin
, , , , , , , , , , , , , ,
3 comments


Why should you try yoga?  When someone first suggested yoga to me, I laughed at the idea of putting aside valuable workout time just to stretch a little bit.  I was so wrong.  Here are some reasons why yoga is an incredible addition to your arsenal:

  • Flexibility: Let’s start with the obvious.  Yoga makes you flexible.  Why is flexibility important?  Let me tell you, I scoffed at the idea of stretching.  Now, I would be upset if I was inflexible.  Once you become flexible, you will love how easier it feels to move about in your every day life.  Blood starts flowing better and hey, some people have actually said they’ve gotten taller.  Flexibility is important because it helps prevent injuries and you get less brittle as you age (read: it keeps you younger longer).  Imagine your body like spaghetti.  When it’s dry and something pushes at it, it breaks.  When it’s wet, it becomes pliant and if something pushes at it, if just bends.  So bend, don’t break.  Go with the flow.  Be like the water.  And any other similarly corny lines.
  • Mental clarity: Second most obvious – it’s meditative.  Not because you sit there and clear your mind (which is actually extremely hard) but because you end up becoming so focused on trying to stay balanced on that one leg that you push all oforearm variationther thoughts out of your mind and just for that one moment, you are living in the moment.  When you are thinking about everything else, you let the moment you are living in slip away.  Also, some yoga postures specifically help increase blood flow to your brain and help clear those cobwebs away.  Take inversions, for example.  Putting your body upside down gets the blood flowing in a different direction but also gets you into different perspectives.
  • Strength: Yoga is amazing because it strengthens all these tiny little muscles that get ignored by other exercises.  These tiny little muscles are important because they help the bigger muscles gain so much more.  Don’t ignore the little people!  Yoga is also amazing because the postures require many parts of your body to work in harmony in such minute detail so you get stronger in multiple areas at once.
  • Balance: Obviously, you will learn how to balance better.  You start balancing on one leg while the other leg is dangling somewhere else, you balance your body on your two hands, and eventually you could balance your body on your fingertips or just your head!  I’m not there yet so I won’t be showing that.  Yoga also teaches you balance in other ways.  You learn to listen to your body and you start to pay attention to which side of your body is different, and in what ways, from the other side.  You learn how to back off if need be and you learn how much your body can accomplish.
  • Detoxification: We are all storing toxins in our body from everything – the air, the chemicals in our soaps, the food we eat, etc.  It takes time for our bodies to get those toxins out and if you are too toxic, the body starts breaking down.  Yoga helps give that body the edge it needs.  Some poses increase blood circulation, some poses stimulate the lymph nodes and particular organs in the body, some poses wring out your body as if it’s a wet towel, etc.  If you try out hot yoga, you also get to have the added benefit of having the toxins leech out of your skin via your sweat.  Some of the postures also have helped people release their emotions (in other words, emotional detoxification)
  • You’re so vain, I betcha think this song is about you: Yeah, it makes you look better, too.  It lengthens your body and makes you more lean.  The improved circulation makes you look healthier and improves your skin tone as you shed that dry skin.  You may also start eating better.  The more yoga you do, the more you pay attention to your body and realize it’s a haven and start wanting to eat cleaner.  Or, you do yoga after eating junk food and feel absolutely horrible throughout the postures and realize you never want to feel so disgusting again and swear off that junk food for months.  Both have happened to me.  And finally, you get to show off to everyone what cool things you can do now and how you can contort your body or stand on one leg longer than them.


Next Yoga Post – How to Safely Bend Your Back More Deeply