What Juicer Should You Buy?
Choosing a juicer can be overwhelming. Here is the lowdown, starting from the cheapest:
- centrifugal
- masticating and single gear
- twin gear
- cold presser
Centrifugal
Pros: fast, easy clean-up, inexpensive
Cons: destroys the nutrients, still leaves wet pulp, loud
Let me get into the cons, since the pros are self-explanatory.
- destroys the nutrients – We all know fruits and vegetables aren’t shelf stable. Pretty much anything we do to them jump starts the release and destruction of nutrients due to oxidation (exposure to the air). Centrifugal juicers basically cut up these fruits and veggies and spin them around at a high speed so that some of the liquid gets separated from the fiber. As a result, you have to drink the juices within 15 minutes of juicing. So you can’t make any juice ahead of time and store them.
- still leaves wet pulp – The drier the pulp, the more you’ve extracted out of the fruits and veggies and the more bang you’re getting for your buck.
- loud – the world and its grandma is going to know you’re juicing whenever you are
Masticating and Single Gear
This is basically the in-between juicer. I suggest this juicer to most people because it’s a nice balance between those who don’t want to spend too much on a juicer but still want quality juicers.
These juicers are gentle enough that you can make your juices ahead of time and store them. Some say you can store up to 72 hours, but I’d just do 2 days max to be safe.
A couple reasonably priced juicers:
Twin Gear
Pros: produces juices with high nutrient value, quiet, leaves dry pulp
Cons: pricey, slow, tedious clean-up
Imagine pushing something through a pair of gears. That something gets gently squeezed and, in this case, produces juices with a high level of nutrients intact and leaves behind dry pulp. These juices can be stored up to 72 hours but I just keep them for 48 hours max, just in case. These juicers come with many parts to clean up and take longer to juice, since it is so gentle on the fruits and veggies.
I have been using this one since 2012 and I still love it:
Cold Presser
This is the Rolls Royce of juicers. The highest quality juices come from these machines. Being as that I’m sure the large majority of us don’t have an exorbitant amount of money to roll around in, I’m not going to waste my breath on explaining these because they don’t come cheap.
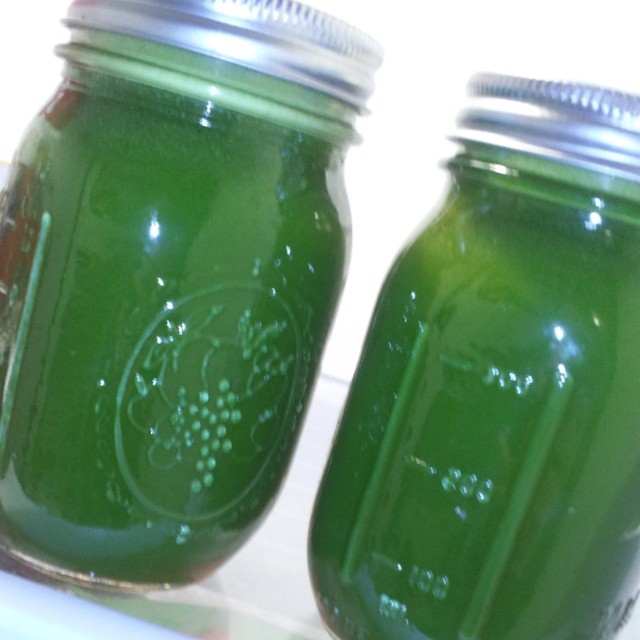
TIP!!!!! When storing your juices, put them in tightly sealed, nonporous (ie, non-plastic) containers, like mason jars, leaving as little air as possible in the containers.
Previous Detox Post – Juicing?