Author Archives: admin

Eggplant Parmesan

01 Nov 14
admin
, ,
No Comments

I love eggplant parmesan.  But when I indulge in some cheesy, saucy goodness, I have to prepare myself for the repercussions of eating a completely unhealthy meal…what with the deeply fried eggplant dipped in batter and covered in breadcrumbs, then the mounds of cheese, and finally the cooked tomato sauce (cooked tomatoes are acidic on the body – raw tomatoes are alkalizing).


So now I have this lightly baked vegan eggplant parmesan dish that’s loaded with nutrients and baked!  I’m very pleased with myself.  I love finding guilt-free versions of unhealthy food.  So let’s begin, shall we?


Eggplant Ingredients:

Sauce Ingredients

  • 2 medjool dates, pitted
  • 1 clove garlic
  • 1/2 cup sun dried tomatoes, soaked at least 1 hour (or at least 10 minutes in hot water)
  • 1 1/2 tbsp apple cider vinegar
  • 1/4 cup dried basil
  • 1/3 tsp dried oregano
  • 1/3 tsp dried rosemary
  • 1/3 tsp dried thyme
  • 3 medium tomatoes (about 1.5-2 cups)

Directions:

  1. Preheat oven to 225º.  Line a baking sheet with aluminum foil.
  2. Lay the sliced eggplant on a paper towel and coat with sea salt (about 1/4  -1/2 tsp per slice).  Let sit for 30 minutes.
  3. Toast the bread, then toss into food processor with nutritional yeast and parsley.  Set aside.
  4. Grind the oats to make flour and set aside.
  5. Drain almonds and put in food processor with water.  Strain through nut milk bag or cheesecloth to make 1 cup almond milk.
  6. Combine oat flour, almond milk, apple cider vinegar, and remaining seasonings in food processor and set aside.
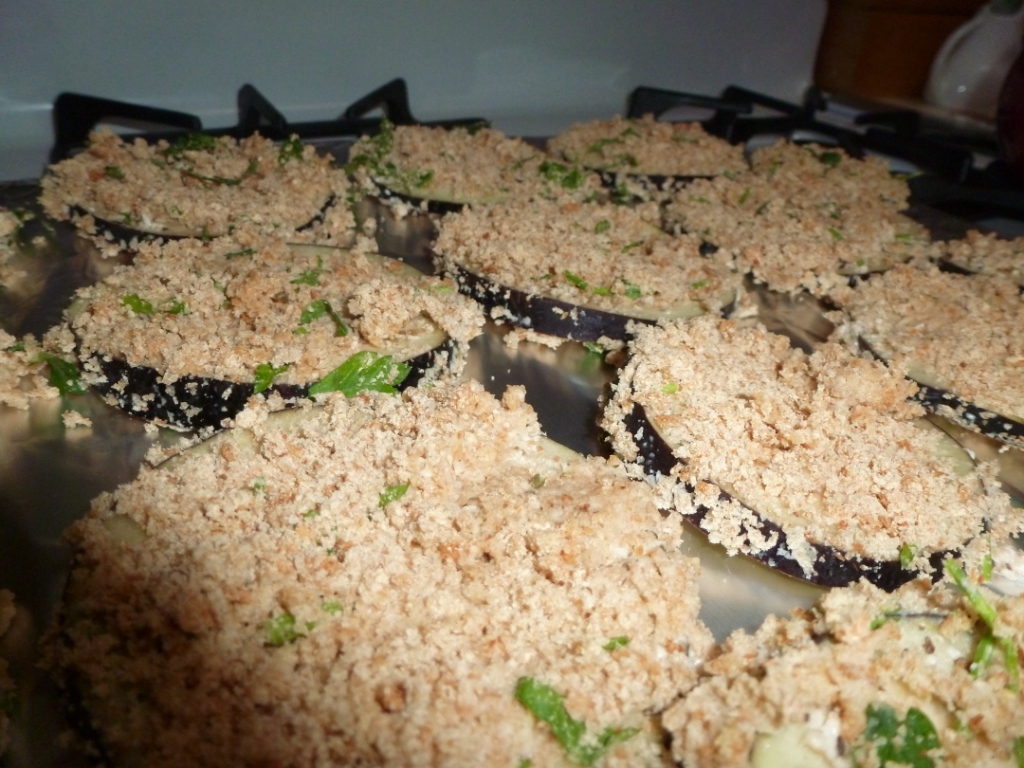
  7. Rinse the salt off the eggplant and pat dry with paper towels.  Dip the eggplant in batter and then coat both sides with breadcrumb mixture, and place on baking sheet.P1000990
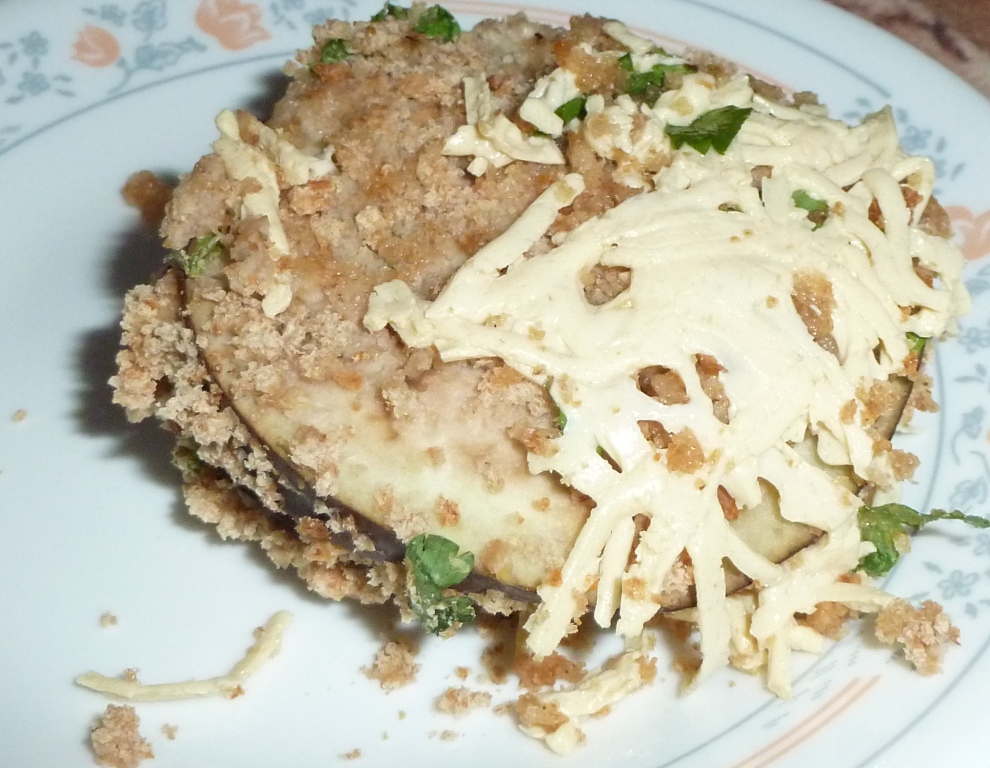
  8. Top eggplants with Daiya cheese and place in oven for 15 minutes.  Flip and bake for another 20 minutes.P1000995
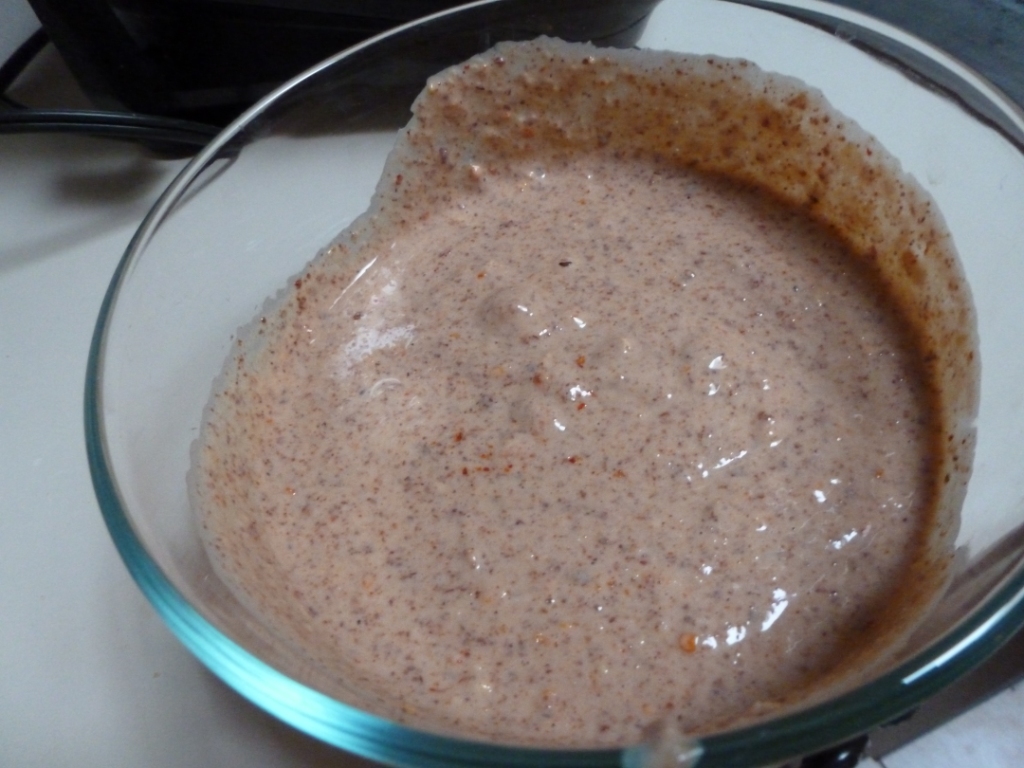
  9. While the eggplants are baking, combine sauce ingredients into food processor.  It may help to process the dates and garlic first, then the sun dried tomatoes, then the rest of the ingredients.
  10. Serve eggplants with healthy dollop of sauce.  Store eggplants separately from sauce.  I recommend not using the microwave to reheat, but instead the oven.

P1010001


Pancake Cinnamon Rolls

25 Oct 14
admin
, , , ,
No Comments

Oh My Deliciousness!!  This is so amazing, you’d have a hard time believing it’s whole and nutritious!  Gently cooked vegan, gluten free pancake cinnamon rolls – now you can have your guilty pleasure breakfast food without the guilt!  I LOVE it when food not only bursts with flavor in your mouth BUT your body also gets to reap the benefits of the nutrients.  I didn’t bother cleaning my blender between uses, aside from a quick rinse.  For those of you who are against using raw honey, you can replace it with maple syrup but the taste will be significantly different.


Ingredients to be done first:

  • 3/4 cup raw almonds, soaked at least 1 hour (preferably overnight)
  • 1 1/2 cup filtered water

Batter Ingredients:

Filling Ingredients:

  • 1/2 cup raisins
  • 3 tbsp raw honey (I use the solid kind, so if you prefer the liquid kind, I do not know how runny the result will be)
  • 2 tsp cinnamon
  • pinch sea salt

Icing Ingredients:

Directions:

  1. Drain almonds and blend with water.  Strain through a nut milk bag and set aside liquid.  This is your almond milk.
  2. Preheat oven to 225º and heat a little coconut oil on a large pan on low heat.
  3. Grind oats, then add baking powder, sea salt, cinnamon and nutmeg and blend.  Set aside.
  4. Add remaining batter ingredients plus 1/2 cup of the almond milk to blender or food processor and blend.
  5. Add dry ingredients to wet ingredients in blender and blend.
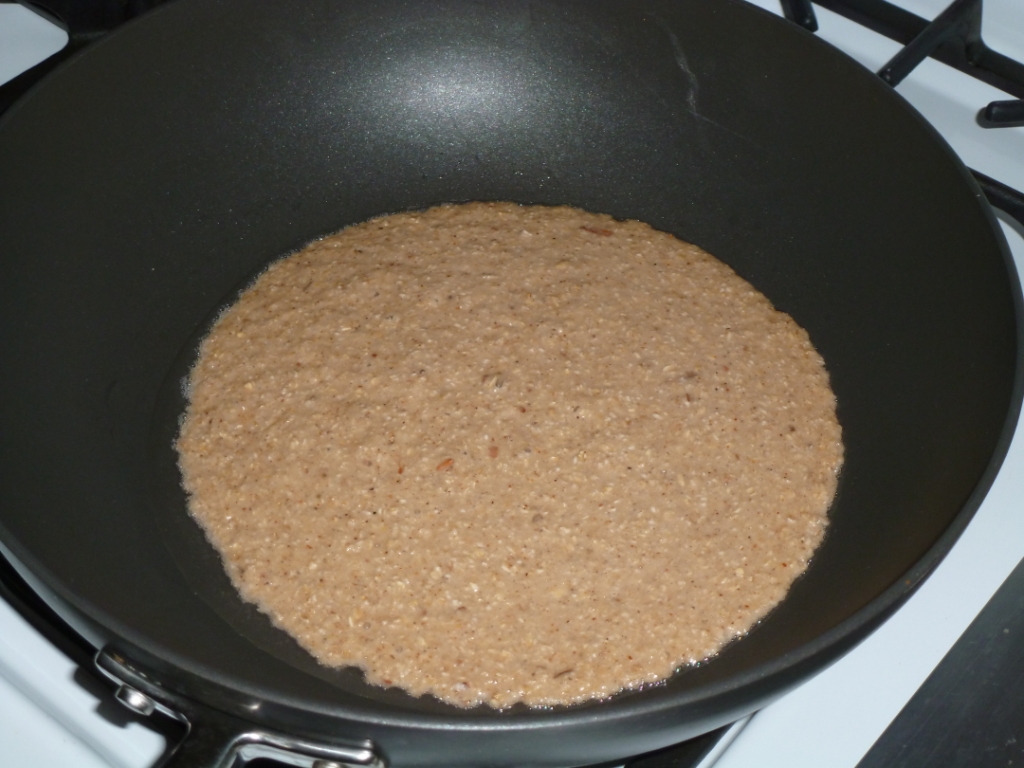
  6. Pour half the batter onto the pan and cook it on medium low until bubbles start popping and the bottom of the batter becomes light to medium brown in color.  You want to spread out the pancake wide and fairly thin.P1000976
  7. Flip batter and cook on the other side for a few minutes, leaving it mostly undercooked.
  8. Repeat with the rest of the batter, making 2 large pancakes.
  9. Meanwhile, blend the filling ingredients until it is fairly smooth.
  10. Spread the filling mixture evenly onto both pancakes, stopping about half an inch from the edges.2014-10-25_14.35.27
  11. Roll the pancakes and cut the roll about 2″ apart, making 2″ high cinnamon rolls.2014-10-25_14.36.47
  12. Place the rolls back onto the pan and put the pan into the oven for about 10 minutes.2014-10-25_14.51.36
  13. While that is cooking, melt coconut butter.  An easy way to do this is to place coconut butter in a shallow cup or bowl, and place the cup or bowl inside a larger bowl filled with very hot water.  If you stir constantly, the coconut butter should melt within a couple minutes.
  14. Blend melted coconut butter with the remainder of the ingredients and 1.5-2 tbsp of the almond milk.  If you have any leftover almond milk and feel uneasy about throwing it out, add a little bit of vanilla extract and maple syrup and enjoy a small beverage!
  15. Once the rolls are done baking, remove and drizzle icing over the rolls for some soft, gooey deliciousness!


Veggie Quinoa Bowl with “Peanut” Lime Sauce

20 Sep 14
admin
, , , ,
No Comments

I’ve never been one for salads, but I think this is semi-salad.  It has a fresh taste to it.  The vegetables are barely cooked and the lime adds a fresh, almost dressing-like flavor to the sauce.  Very easy to make and of course it’s delicious.  It is very close to raw vegan, the only thing is that the quinoa is cooked and the vegetables are VERY slightly cooked.  But all you’d have to do to make it vegan is to replace the quinoa with raw noodles instead, like kelp or zucchini noodles.  I like more starch-like flavor in my food, I guess.  Plus, it’s gluten free!


Ingredients:

  1. Cook quinoa according to directions.
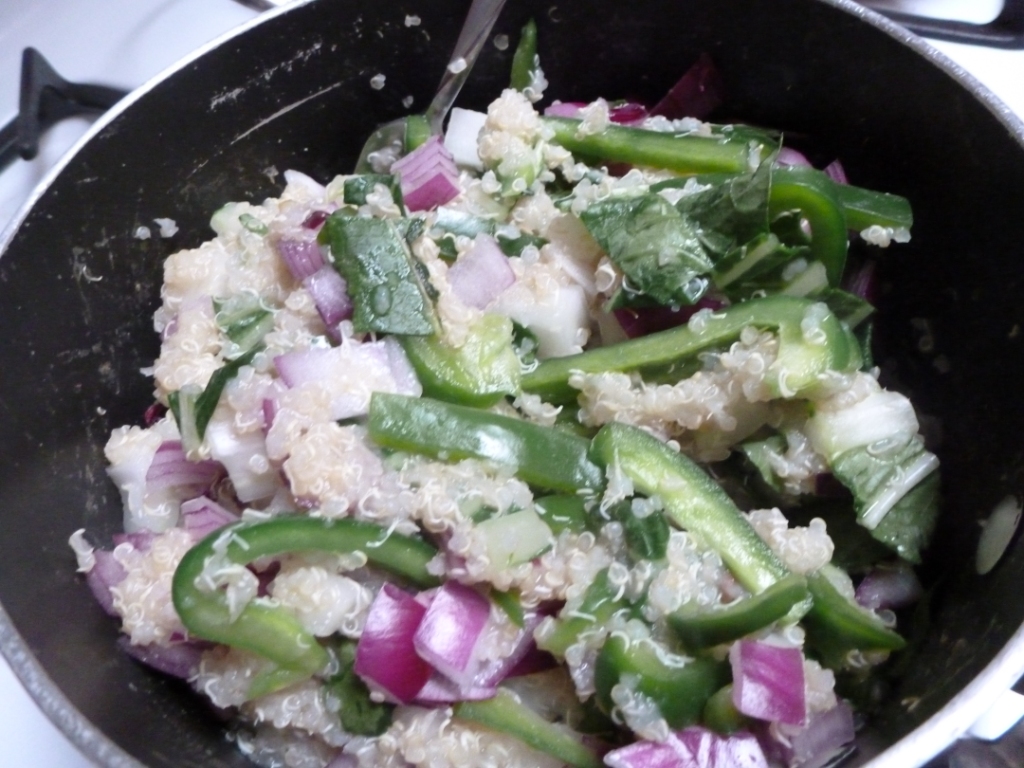
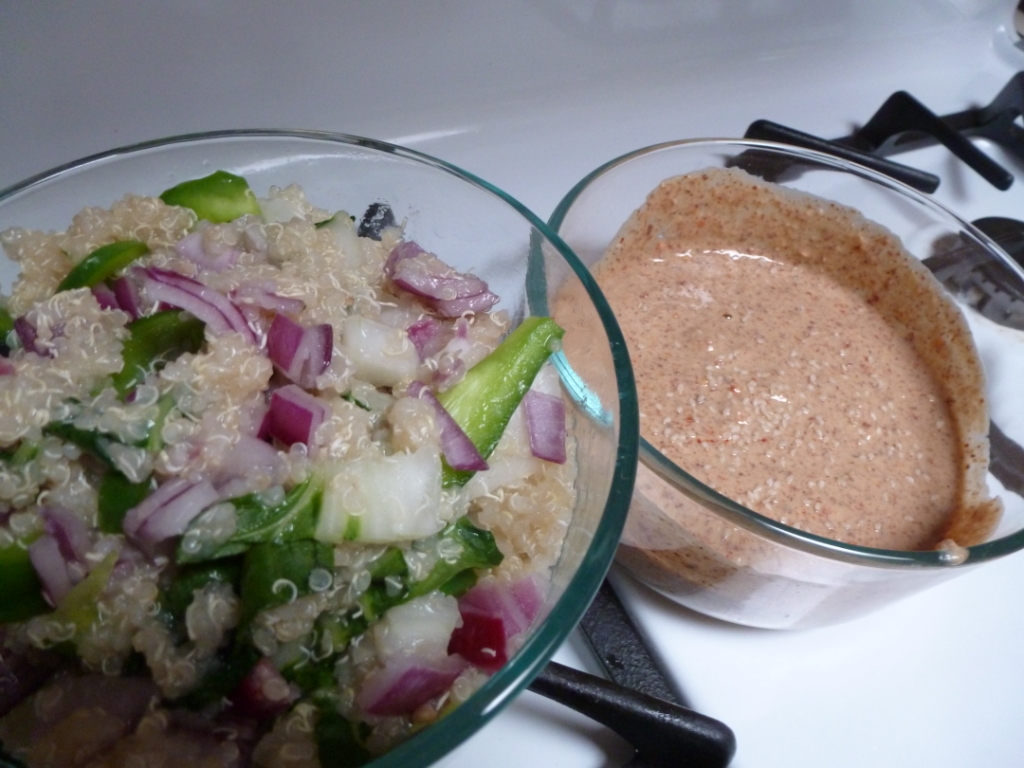
  2. Meanwhile, add ginger and garlic to a food processor or blender and blend.  Then add almond butter, tamari, lime juice, maple syrup, and water.  Sprinkle with sesame seeds, if desired.P1000916
  3. Once quinoa is finished, turn off heat and stir in remaining vegetables, until the bok choy leaves become a little wilted.P1000915
  4. And that’s it!  Serve cold.  To serve, drizzle desired amount of sauce over the quinoa.  Otherwise, keep them separated.  Enjoy!

P1000918


Easy Morning Detox – Warm Lemon Water (With Cayenne)

22 Aug 14
admin
, , ,
2 comments

Start Your Day By Helping Your Body Clean Itself with Warm Water with Lemon and Cayenne

Ditch the coffee! Drink this, instead, and your body will thank you!


There are so many benefits to starting your day off with this.  My morning routine typically consists of oil pulling, then warm water with lemon and cayenne, then green juice about 30-60 minutes later.


I won’t lie, it took some getting used to, and I would skip days of drinking this.  However, every single one of those days I’ve skipped, I’ve noticed a considerable difference with the release of fluids from my body.  Because of that, I now drink this every single morning that I can.  Maybe this is TMI, but I do notice a difference in color of my morning urine as well as volume.  The reason this happens is because the fresh squeezed lemon helps clean out the liver, which is one of the most important organs in your body because that is what clears out the toxins from your body.  However, it gets bogged down when it is overwhelmed with toxins to process, resulting in diseases, allergies, weight gain, a poor complexion, etc.


What are some other benefits?  Glad you asked.

  • vitamin C from the lemons = boost in the immune system
  • provides your body with natural energy in various ways, including by hydrating your lymph system
  • pectin fiber from the lemons aids in colon health
  • alkalyzing power balances the pH in the body (meaning it fights against your body becoming too acidic)
  • aids digestion and encourages production of bile
  • great source of citric acid, potassium, calcium, phosphorus, and magnesium
  • dissolves uric acid, thus reducing pain and inflammation in joints and promotes healing
  • helps against acne and wrinkles
  • relieves tooth pain and gingivitis
  • helps prevent kidney stones
  • assists in weight loss
  • and again, it helps cleanse your system by getting rid of unwanted substances from your liver!

Okay you convinced me.  How do I do it?

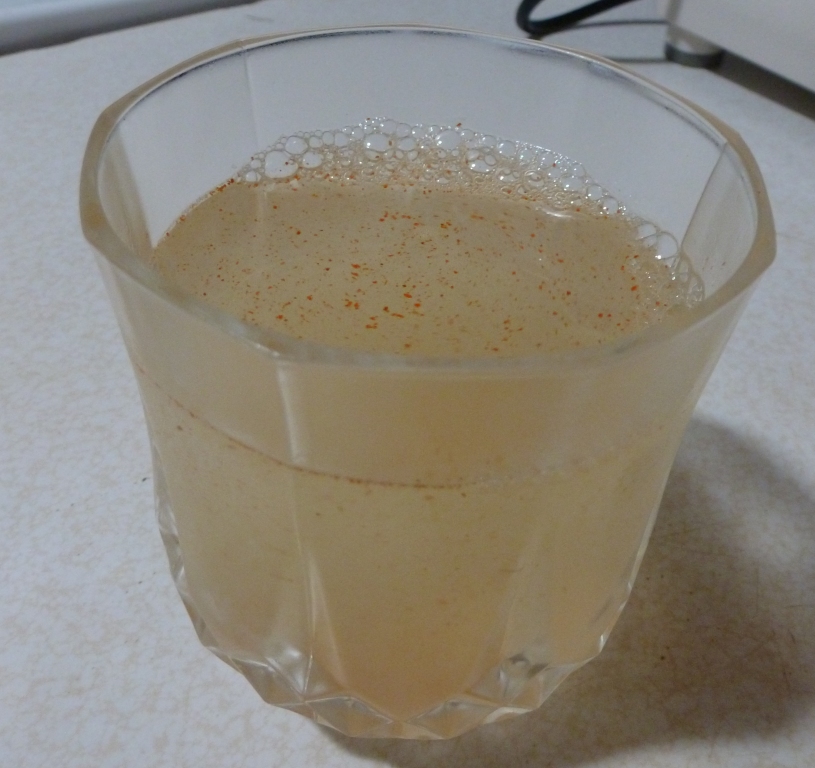
Quite simple, actually.  Take a cup of filtered water and heat it up over the stovetop (nuking it just takes away the whole point).  Mine is strong so it only takes a few seconds.  Meanwhile, squeeze half a lemon into a cup and add a pinch of cayenne pepper.  Add water and drink.  This should be the first thing you consume in the morning.  Try to wean off the coffee – it’ll just negate what you did for your body.

P1000862Enjoy the benefits!


Previous Detox Post – How to Naturally Relieve Sinus Congestion

Next Detox Post – Face Clearing Exfoliator

Standing Bow Tips

13 Aug 14
admin
,
No Comments

Standing bow is sometimes also called dancer’s pose.  It is one of the 26 asanas or postures in a Bikram hot yoga class, but it does make appearances in other classes as well.

Some people seem to can’t figure out how to get further in this pose so I’m going to give a few not-so-obvious tips to help you out.  Obvious tips would be to work on your balance and to keep practicing.  Well, while you do that, try these tips as well!


Tip 1: Bend your back

One thing that many people don’t realize about getting into a deeper standing bow is how much back bending is involved to get into the posture.  As you raise your leg, you are supposed to keep yourself upright before folding over.  Many people start folding their torsos over as soon as they feel any discomfort, but try to take notice of that discomfort and pull your leg up a little higher while staying upright (hence the back bend) before folding over.  Obviously, keep that leg in the same position or higher as you fold over.  This will help open up your hips some more as you fold over.  As you can see in an old picture of myself in class, there is a bend in my back as I’m folding down.


Tip 2: Work on opening your hips

I suggest that you work on other postures that will open your hips, and start practicing hanumanasana (monkey pose, or put simply, a split).  Once I started incorporating a split into every class, this pose started becoming easier to get into, as you can see from this picture about a year later:


One thing to keep in mind, however, is you want to try to level your hips.  It is easier for us to open up your hips in this pose, but you want to try to get both hipbones parallel to the floor.  If you can see in the below picture (I know it’s not perfect), my standing leg looks pretty stable, and that’s because my hipbones are facing the ground instead of opening up.

A DSCF5397


Tip 3: Start lowering your hand

As you get deeper and deeper into this pose, try to see if you can bring your hand down to your shins, which will help you pull your leg closer to your body and, thus, bring the foot closer to the sky.


Previous Yoga Post – Knock Out That Headstand!

 Next Yoga Post – Crow Pose

Pineapple Mango Sorbet

01 Aug 14
admin
, , , ,
3 comments

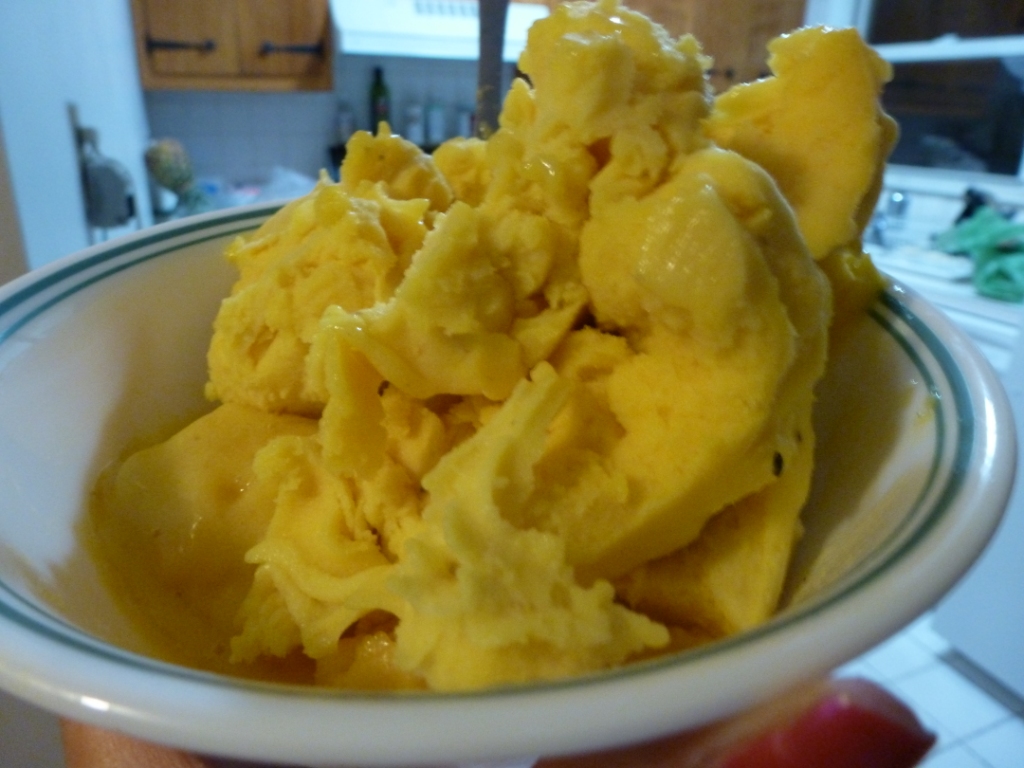
So easy and so quick to make, and a great way to get some potassium, zinc, iron, and manganese, not to mention vitamins A, B, C, and E!  This raw vegan, gluten free delight is my favorite way to eat fruit!  You can use other fruits, of course, instead of mango and pineapple, but the banana is necessary to sweeten it.  I find that raspberries result in a slightly unpleasant texture due to the seeds.  The easiest way to make this is to use a juicer with a homogenizer attachment, which should be found with most single and twin gear juicers.  I’ll provide a recipe for use with a blender but I cannot entirely vouch for it, and it may result in more of a soft serve than a sorbet.


Ingredients:

  • 1 frozen ripened banana
  • 1/2 package frozen pineapple
  • 1/2 package frozen mango

Juicer Method

  1. Break up the banana into 6 pieces.
  2. Put through juicer using homogenizer attachment, alternating fruits.  I put a couple pieces of pineapple, followed by a piece of banana, and then a couple pieces of mango.

Blender Method

  1. Let banana sit out at room temperature for about 10 minutes.
  2. Blend pineapples and mangoes to break them up, then add the banana.
  3. You may have to stop the blender and scoop the sides many times before everything comes together.

P1000733

There you go!

Quesadillas with Raw Vegan Saucy Salsa

24 Jul 14
admin
, , , , ,
2 comments

I seriously, seriously love these quesadillas.  When I first started going vegan, these were my go-to meals.  They are so delicious and very easy on the digestive system.  Cleanse-friendly!  For those who are having trouble weaning off dairy, I highly suggest these quesadillas.  It took a while for me to create a salsa I would like that would mimic the jarred salsas, and I think this one does the trick.


The quesadillas themselves are not raw vegan, but I do not cook the vegetables or the cheese I use in them and instead let them get heated up within the tortillas.  The salsa is raw vegan, however.  This entire recipe can be made gluten free by using the brown rice tortillas.


Quesadillas

Makes 6 servings.

Ingredients:

Now, I use a quesadilla maker to make my quesadillas.  It’s an inexpensive piece of equipment which saves me a lot of time and hassle, since it’s so easy to clean and I won’t have to worry about all my ingredients falling out of my tortillas when I flip them.

Here’s how to make it with the quesadilla maker:

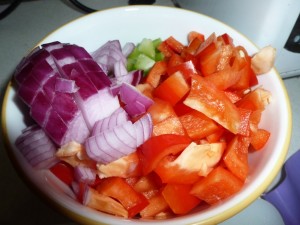
Place one tortilla on quesadilla maker.  Add a couple tablespoons of shredded cheese, followed by a third of the vegetables, P1000771and then the rest of the third of the cheese.  P1000772Place another tortilla on top and press the quesadilla maker closed.

Alternatively, you would heat a large pan on medium high heat with a small amount of olive oil (or none if you prefer).  Assemble the quesadilla accordingly and then place on the pan, pressing down on the quesadilla until the bottom becomes a golden brown.  Flip and repeat the process for the other side.

Serve immediately, or wrap in aluminum foil and store for later.  To reheat, simply place the quesadilla on a sheet of foil and heat in a toaster oven.  I put it on Toast for Medium-Low.P1000773


Saucy Salsa


Makes about 8-10 cups.

Ingredients:

  1. First add the sundried tomatoes, dates, and garlic into the food processor or blender to break them up.
  2. Add the rest of the ingredients except for the tomatoes and onion and blend.
  3. Cut 2 tomatoes into quarters or however size that will allow them to fit and move around in your food processor or blender and blend.
  4. Add the last chopped tomato and onion and pulse until all ingredients are incorporated.

How to Naturally Relieve Sinus Congestion

04 Jul 14
admin
, , , , , , , ,
one comments

Sinus congestion is horrible – not being able to breathe, going through boxes of tissues, restless nights, etc.  If you want to relieve it without resorting to medicine, here’s what to do:

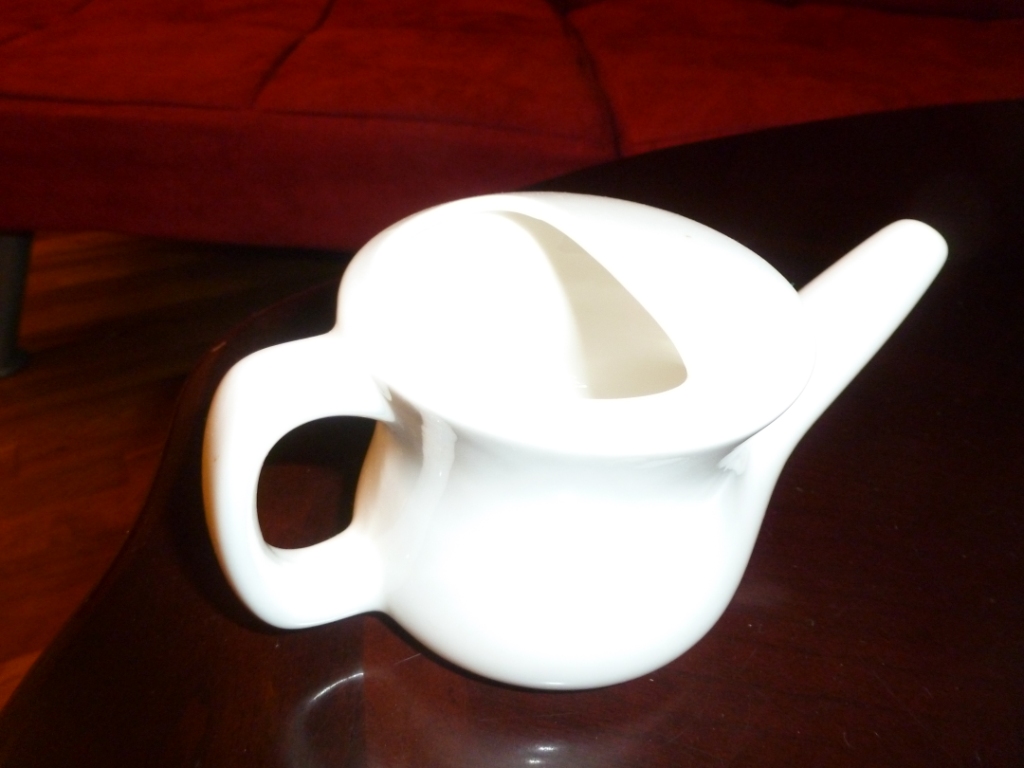
  1. Use a neti pot once a day.  The neti pot will irrigate your sinuses, freeing up some of the congestion and washing out some of the stuff stuck in there that may be causing the congestion in the first place.
  2. Take raw honey and cinnamon 3 times a day.
  3. Drink at least 16 ounces of green juice for breakfast every day.
  4. Get upside down!  Going upside down will also help free up some of the congestion.  It will be hard at first because you won’t be able to breathe at all through your nose but stay upside down and you’ll notice the congestion starts getting looser and moving around.
  5. Massage your face to loosen things up.  I use my fingers to massage the area between my cheekbones and my nose, the area below my eyes, in outward circles.  Also try massaging the area outside of the eye cavity, just above the nose but below the brows, as well as your cheekbones.
  6. After a hot shower, immediately blow your nose.
  7. AVOID DAIRY!  Dairy already causes mucus buildup in your body (albeit in the colon, not the nose) but you will make your body work even harder to get rid of the sinus congestion if you consume dairy.  In fact, you should ideally stick to as much of a raw vegan diet as you can.  Also try eating spicy food.

And there you go!  If you do all of these, you’ll notice major strides within a day or two, and should be able to completely kick the congestion’s butt soon after that.


P1000775


Previous Detox Post – Benefits of Raw Honey and Cinnamon

Next Detox Post – Easy Morning Detox – Warm Lemon Water (With Cayenne)

Knock Out That Headstand!

04 Jul 14
admin
, , ,
No Comments

Headstands can be intimidating at first.

 photo2


Forward folds will help you get used to the idea of being upside down.


Once you get used to being upside down, it’s now just a matter of getting your body positioned so you can get your legs in the air.


So here are some tips:down dog

  • Usually we are taught to get into it from downward dog.  Whether or not you are in headstand with your forearms on the ground or in tripod headstand with just your hands on the ground, you want your elbows to be no wider than your shoulders.  An easy way to measure is to bend your elbows and grab the opposite elbows with your hands.  That’s the width.  Do not go wider than that.  You will risk crunching into your shoulders.  You want to gain your strength by pulling your shoulders away from your ears and push into your hands or forearms.  If your forearms are on the ground, you want to feel as if you can lift your head off the ground.


  • If you’re in tripod, make sure your arms are at a 90 degree angle and your elbows are shoulder-width apart.
  • Bring your feet in until your hips are above your shoulders.  That is where your stability will be.  Lock that position in by keeping your tailbone tucked in and your mula bandha (pelvic muscles) engaged (squeeze them).victoria (4)
  • Once that happens, I find the easiest way to get into it is to bend one leg into your body, lifting that foot off the ground, then the next.  The reason this is easiest is because your center of gravity has little danger of shifting.  If you’re doing tripod, you can rest your knees on your upper arms.
  • Then, slowly raise your legs up.  Engage your legs.  I find the best way to do this is to flex your feet as if you’re standing on the ceiling.  Keep your tailbone tucked!  Engage your belly and your pelvic muscles!  Stay focused on one spot somewhere.
  • Don’t let stray thoughts into your mind.
  • Practice, practice, practice!


Previous Yoga Post – Downward Facing Dog

Next Yoga Post – Standing Bow Tips

Benefits of Raw Honey and Cinnamon

29 Jun 14
admin
, , , , , ,
No Comments

There are so many benefits to this concoction but on top of it, it’s delicious.  I drink hot water with raw honey and cinnamon every day.  Typically, I add 1 tbsp raw honey and 1 tsp cinnamon to about 1 cup of water.  It’s also just a great way to add fluids to your diet if you don’t like to drink water.

Get them here:

Out of the slew of purported benefits, I can definitely personally attest to a few of them.

Relieves sinus congestion – I’ve had a couple experiences of something entering my nasal passages and causing sneezing fits and my sinuses to get majorly congested.  I know one was from the air conditioning at work and the other I am guessing was some sort of dust that lodged itself deep into my nose.  When that happens, I aim for 3 cups a day of this concoction, and let me tell you, it really does the trick.  I will literally feel some sort of relief immediately after drinking, and complete relief within a few days.


Kicks sicknesses – On a similar note…I haven’t been sick in 9 years so I can’t say for myself, but I did tell people to try this out when I saw that they were sick.  One of them now drinks it every day too because of that, and the other told me it normally takes her 10 days to get better but instead, she got 90% better over the weekend!  For you skeptics out there, she started drinking on a Thursday or Friday, not on a Monday or something.


Aids digestion– Drinking this helps get things moving in your colon.  It might be beneficial to drink it before a meal.  Based on personal experience (and the testimony of someone else I know), it seems that the more junky the food you have inside you, the more likely your body will push things out of your colon…so maybe it’s a detoxifier as well.  I’m going to go with it.


Other benefits include:

  • lowers cholesterol and strengthens the heart
  • relieves (and maybe even cures) arthritis
  • prevents bladder infection by destroying the germs in the bladder
  • cures stomachaches and clears stomach ulcers
  • relieves gas
  • strengthens the immune system and protects the body from bacterial and viral attacks
  • kills the influenza virus
  • keeps skin fresh and soft, and slows down the aging process
  • removes pimples (apply a daily paste of 3 tbsp raw honey and 1 tsp cinnamon powder on pimples at night, wash in the morning with warm water)
  • cures skin infections like eczema and ringworm (apply equal amounts on affected parts)
  • weight loss by drinking in the morning before breakfast and at night before sleeping (supposedly, it does not allow the fat to accumulate in the body)
  • cures cancer (based on research in Japan and Australia)
  • helps fatigue and increases the vitality in the body
  • prevents bad breath (gargle 1 tsp of each with hot water in the morning)
  • restores hearing if taken daily, morning and night, in equal parts


Digestive Tea

Now, having said all that, I am going to include a bonus recipe.  This is a delicious tea with beneficial digestive properties.  The lemon aids in clearing out your liver, the ginger improves the absorption and assimilation of nutrients to the body and soothes the stomach and colon, and the raw honey and cinnamon has all the benefits I just stated above.  So try it out!  I make this tea on the weekends, since it’s harder for me to slice ginger and squeeze lemon at work.

Makes 1 serving.

Ingredients:

  • 1 cup hot water
  • a few thin slices ginger root
  • 1/4 – 1/2 lemon, freshly squeezed
  • 1 tbsp raw honey
  • 1 tsp cinnamon powder
  • previously steeped tea (optional)

Mix all ingredients together.


The reason I add the previously steeped tea is to add flavor, and once tea has been steeped already, it has been naturally decaffeinated.  Enjoy!


P1000767


Previous Detox Post – What Do I Put In My Juice?

Next Detox Post – How to Naturally Relieve Sinus Congestion